
How to Track Micro Conversions with Google Analytics
To immediately clear the air, this post is not about why you should be tracking micro conversions. If you are a seasoned marketing professional, you already understand the importance of them.
This post is about how you can use Google Analytics (GA) coupled with Google Tag Manager (GTM) to identify and track the end-impact of those micro conversions.
You will be able to set up segments within GA that are tied to a specific micro conversion on your site and answer the question,
“Are people who experience this micro conversion more or less likely to achieve a macro conversion?”
Some examples of other types of questions you’ll be able to answer include:
- “Are people who visit the special offers page more likely to convert?”
- “Which CTA leads to a higher rate of sales?”
- “Which blog pages lead to a higher chance of newsletter signup?”
- “Are people who watch our video more likely to fill out the form?”
Disclaimer: Be on the lookout for false positives. They are terrifyingly easy to fall victim to using this tactic. Start with the data, and then take a qualitative look at the micro conversion and determine if it was the micro conversion or something else that had an effect on conversion rates. Remember, you aren’t in your users head, so you have to use context clues about their experience to understand their intent.
Step 1: Figure Out What You Want to Track
Already tracking your micro conversions in GA? Skip to Step 3: Setting up your Segments and Analyzing
Experience it Yourself
Mimic all the possible journeys a user can experience through your site and pay attention to every action you take. This includes things like CTA clicks, element views, form fills, video plays, or page depth. Take note of any of these micro conversions, as you will be setting events up for them later in GTM.
Check the Data
While the behavioral flow tool in GA can be useful, I find it a bit hard to easily comprehend in a timely manner. Below are a few alternative ways you can use GA to see what pages users most commonly visit before converting.
Navigation Summary
Using the Navigation Summary view is a great way to see where most of your users are coming from in relation to your contact/lead generation page.
- In Google Analytics, navigate to “Behavior>>Site Content>>All Pages.”
- Choose a macro conversion page (such as your contact page).
- Select the “Navigation Summary” view.
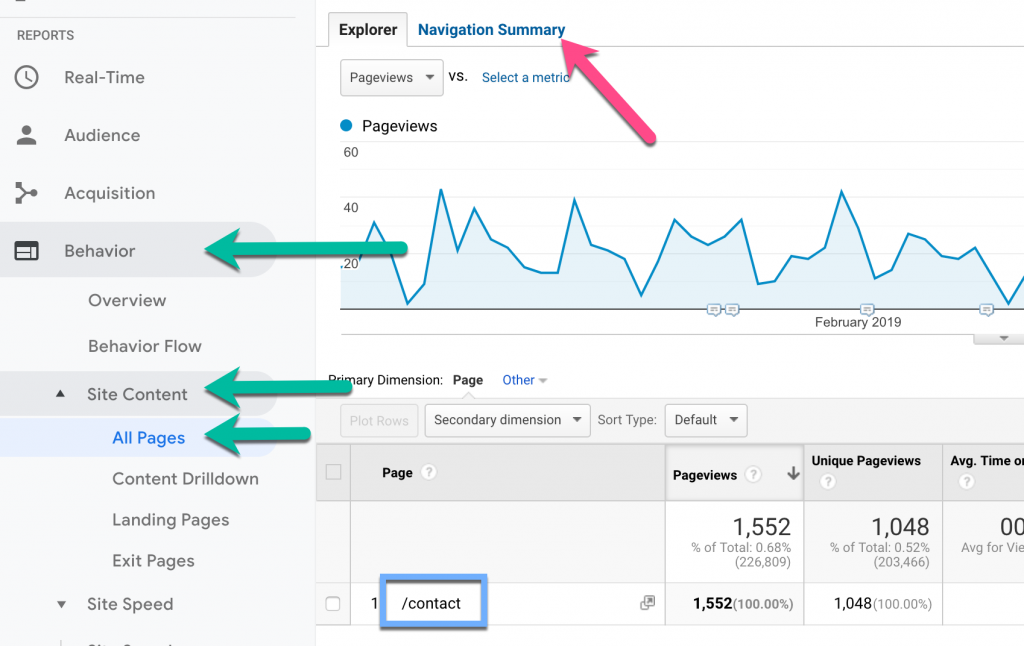
When you get to this view (screenshot below), you can see the most common “previous” and “next” pages a user visits in relation to the page you selected.
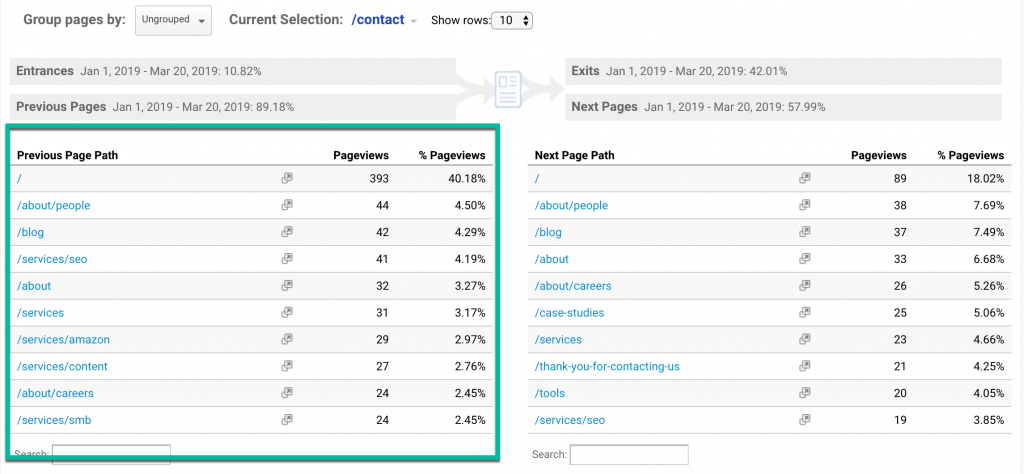
This is a great way to understand which page most commonly sends users to the contact or lead generation page of your choosing. If any of the % Pageviews stand out from the rest, it is worth tracking visits to that page as a micro conversion to see if it really does attribute to macro conversion rates.
Goal Completion Location: Goal Previous Step
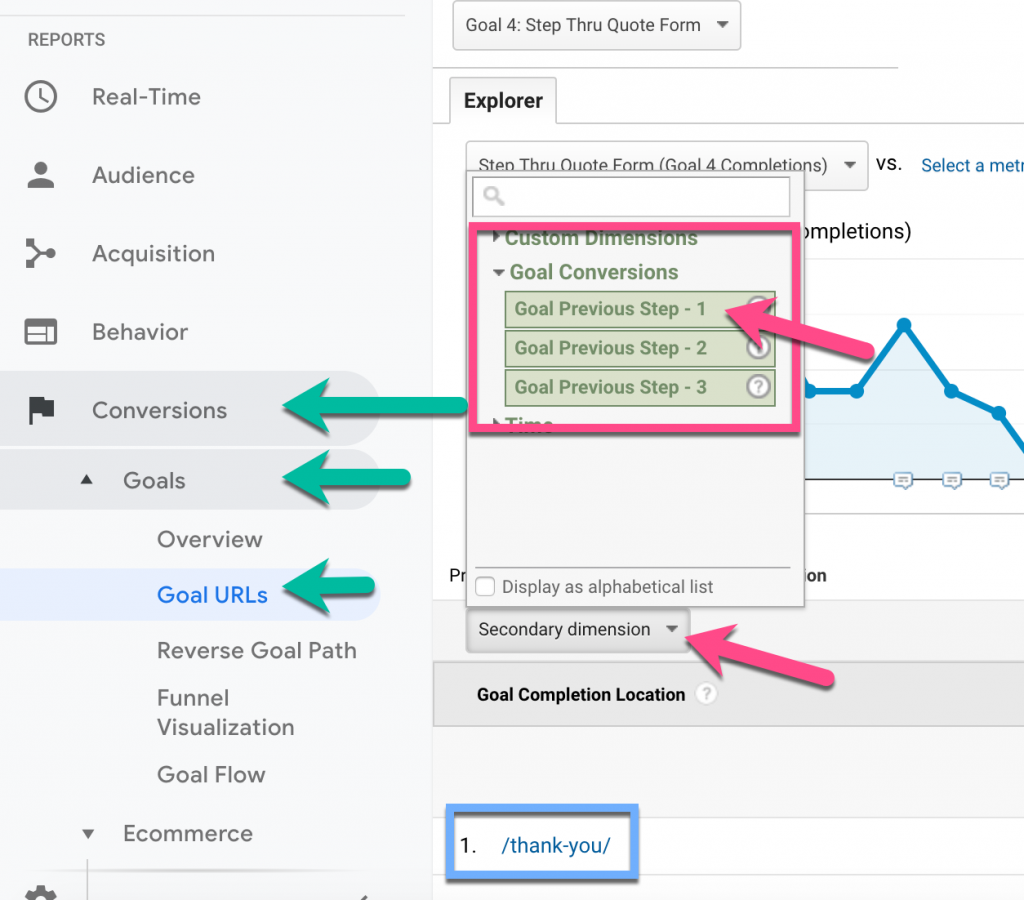
If your macro conversion has a thank you page as the Goal URL (and the macro conversion form lives on multiple pages of the site) you can use this tactic to learn the pages that most commonly lead to that macro conversion.
- In Google Analytics, navigate to “Conversions>>Goals>>Goal URLs.”
- Choose a macro conversion Goal URL (such as your thank you page).
- Select the “Secondary Dimension” list and choose “Goal Conversions” and then choose “Goal Previous Step – 1.”
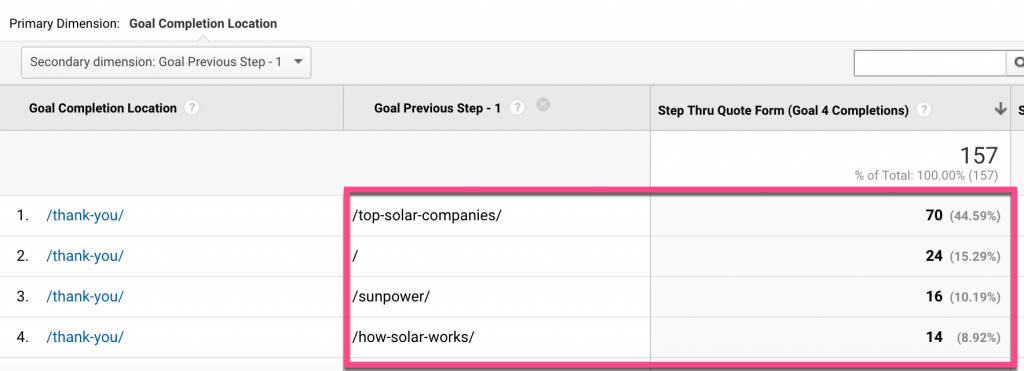
In this view (screenshot below) you can see which page(s) most commonly resulted in a thank you page visit. Remember, this tactic is best when your lead generation forms exist on pages other than your contact page.
Observe Your Users
Use a session recording tool like FullStory. Filter for only users who reach the macro conversion and observe. Look for patterns that might be attributed to their end conversion.
Step 2: Use GTM to Set Up Events for Micro Conversions
For non-page visit micro conversions, you will need to use GTM to set up events. It’s a simple process, but you will need a basic understanding of how to use GTM first.
My favorite method for this is using the “Preview” tool in GTM and performing all the micro-interactions I want to track.
Make Sure All of the Variables for the Interactions you Want to Track are Active.
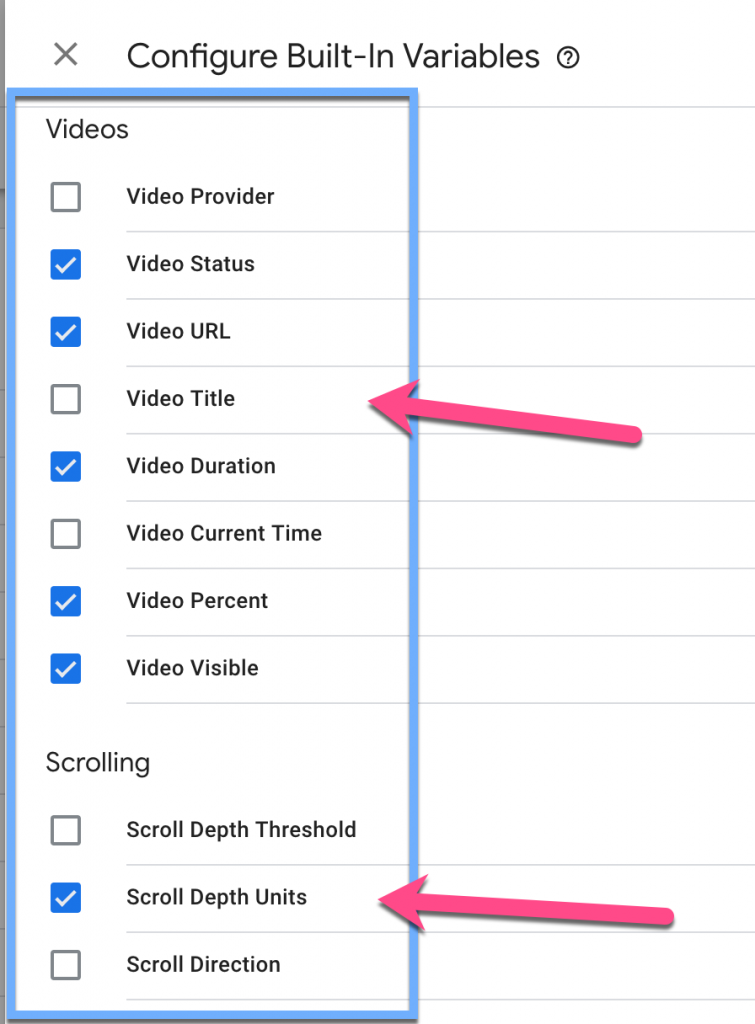
For example, if you want to track video views as a micro conversion, you will need to enable the variables under the “Videos” section of the Built-In Variables list.
- In GTM navigate to “Workspace>>Variables>>Configure.”
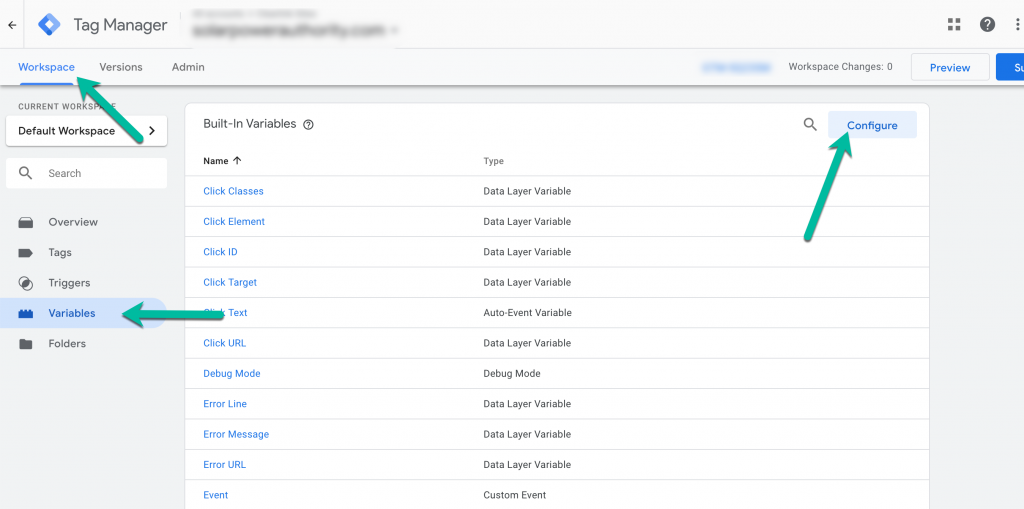

- Find the variables related to the micro conversions you want to track (most commonly, this will be clicks and should already be activated).
- Select the variables you want GTM to track.
Go into Preview Mode and Perform the Micro Conversions
This is where you are going to determine what variables associated with the micro conversion you are going to use in order to track it.
- In GTM, choose “Preview Mode” on the top right.
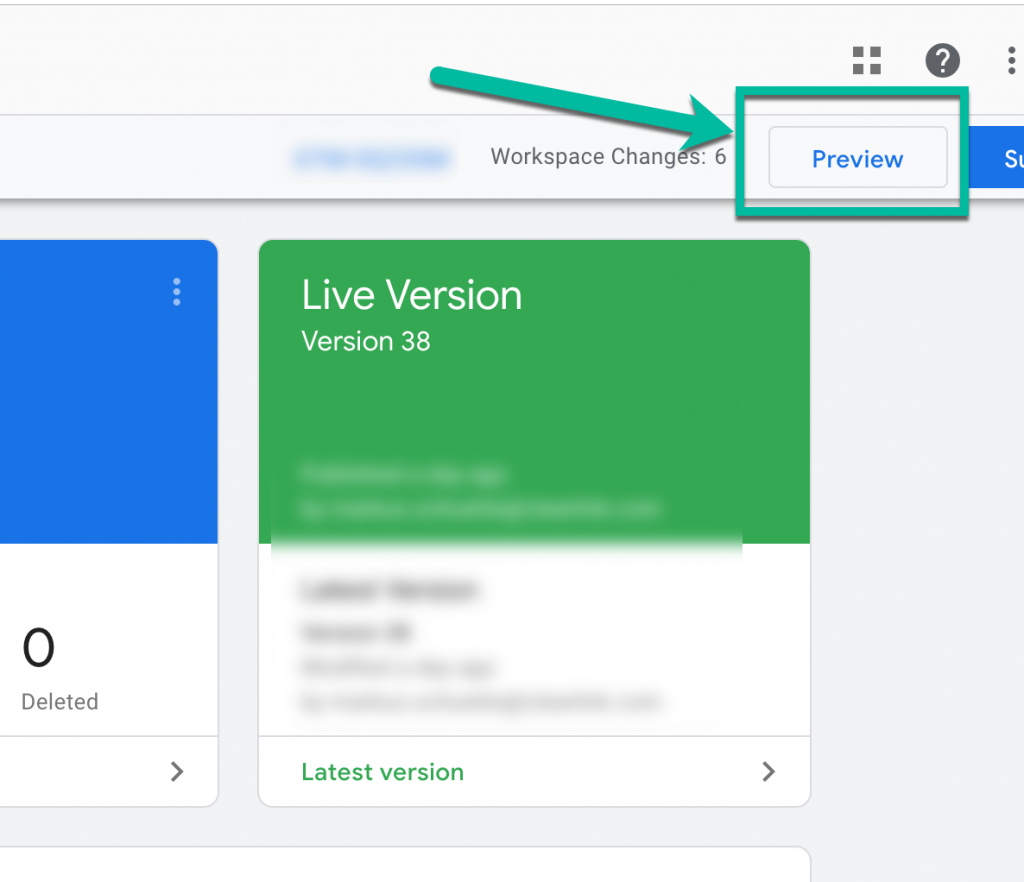

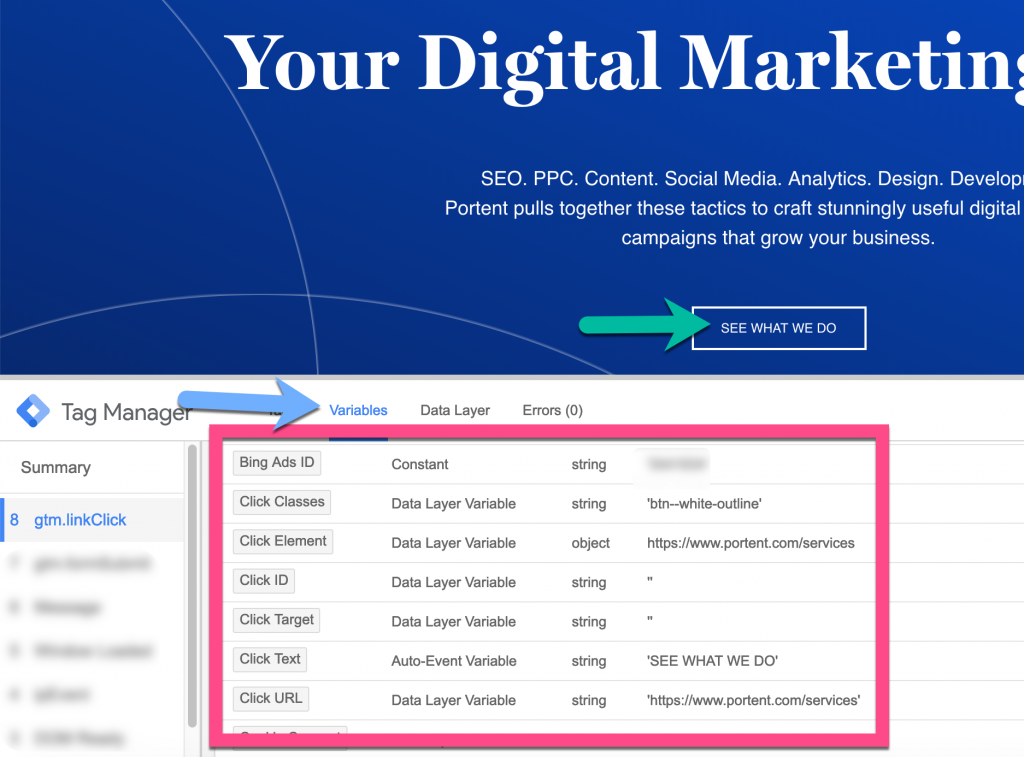
- Open your website and perform the micro conversions you want to track. If your interaction sends you to a new page, hold the Command function (Mac) or Control function (PC) on your keyboard and then perform the action to open the page on a new tab. Once you perform your action, go to the Variables selection in the Debugger tool and find unique variables associated with that action. You will want to use a combination of variables so that this event only fires when that specific action on that specific page takes place. In the screenshot example below, we are looking to find unique variables to the hero CTA, “See What We Do.”

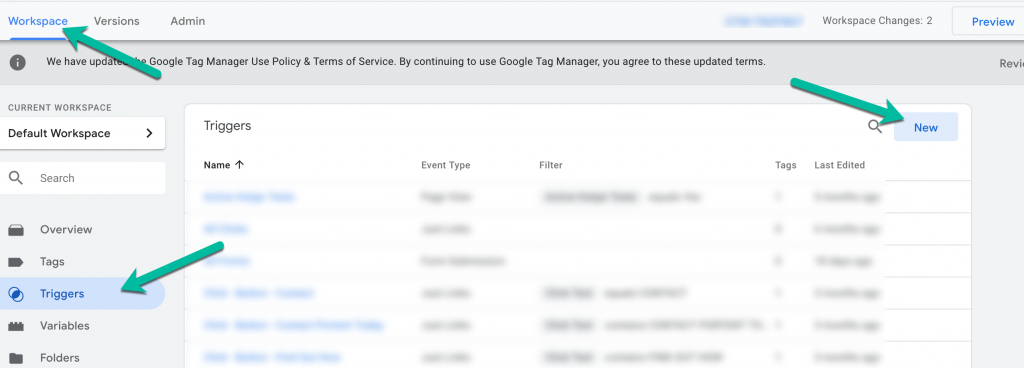
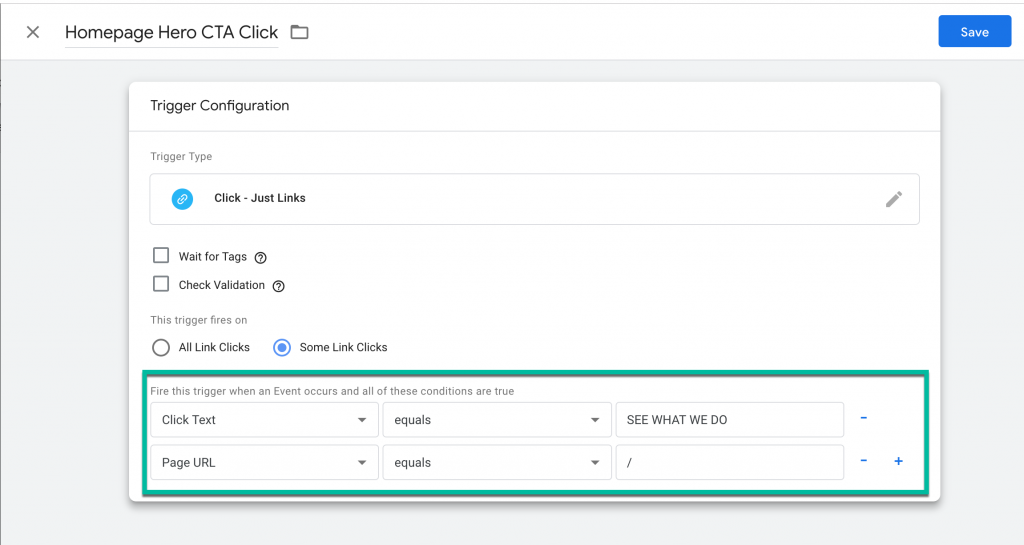
- Set up a trigger for your micro conversion. This will allow you to use a combination of variables and trigger an event once all those variables are met. In other words, it will allow you to track your micro interaction. In GTM, navigate to “Workspace>>Triggers>>New.”

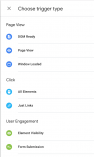
- You will then be presented with a view of “Trigger Types” to select from. Choose the one that equates to your micro conversion. For example, if your micro conversion is a link click, choose “Just Links” under the “Click” type.

- You will then be presented with a “Trigger Configuration” view. Complete the criteria and choose the variables you found to isolate the micro conversion. See an example below for the “Homepage Hero CTA” click we referenced earlier.

Set Up GA Events Using GTM
Next you will create a Tag that will fire an event once your micro conversion has been triggered.
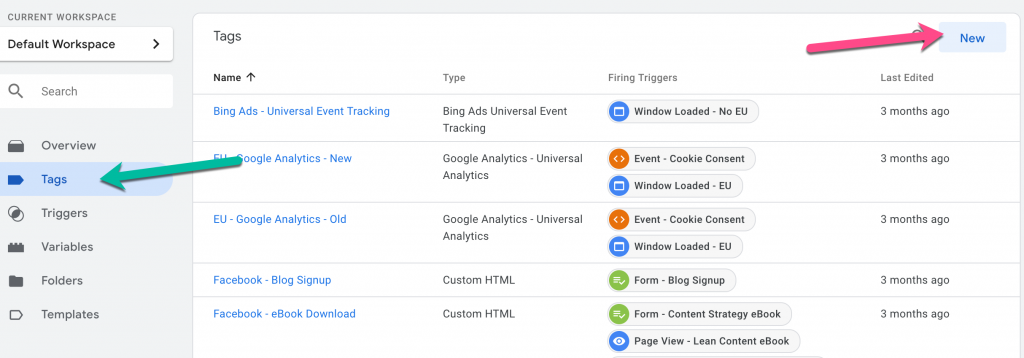
- Navigate to the “Tags” section and choose “New” on the top right.

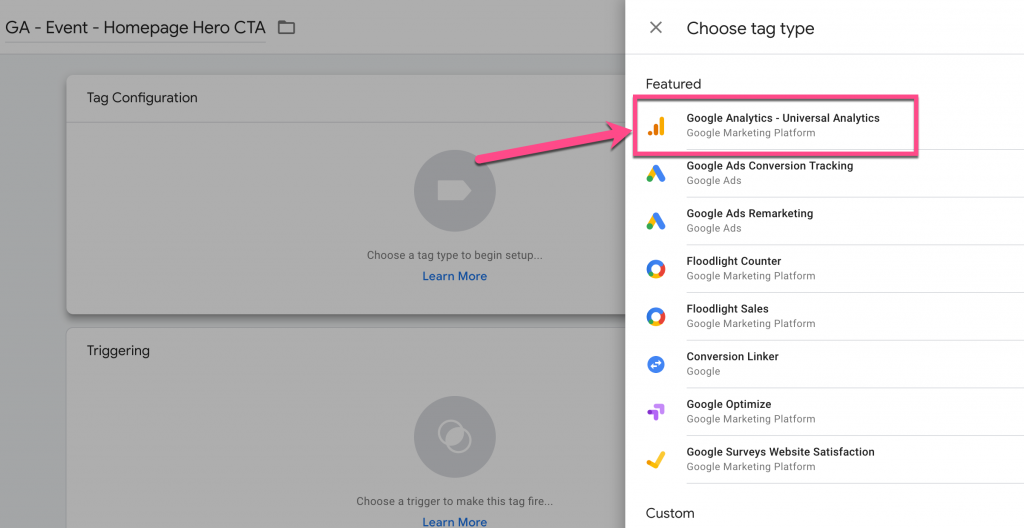
- Click on “Tag Configuration” and choose your tag type. In this case, you will choose “Google Analytics.”

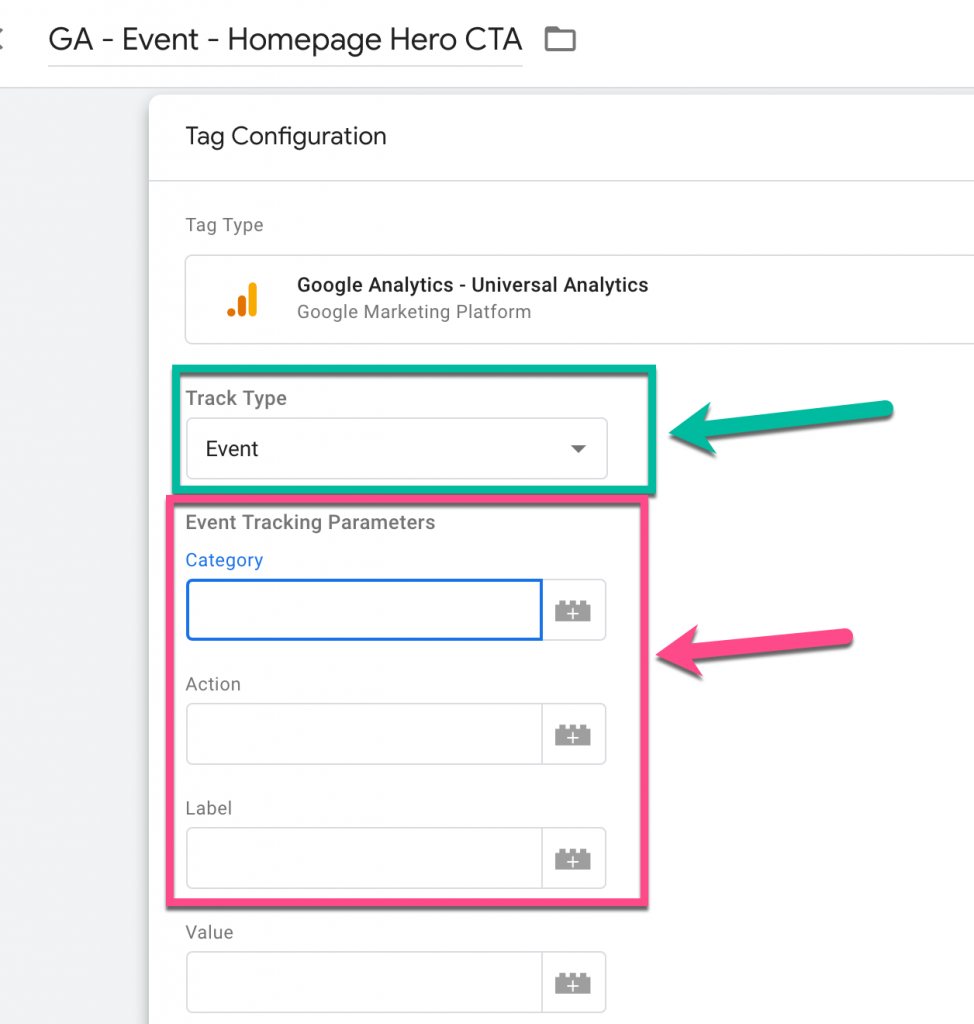
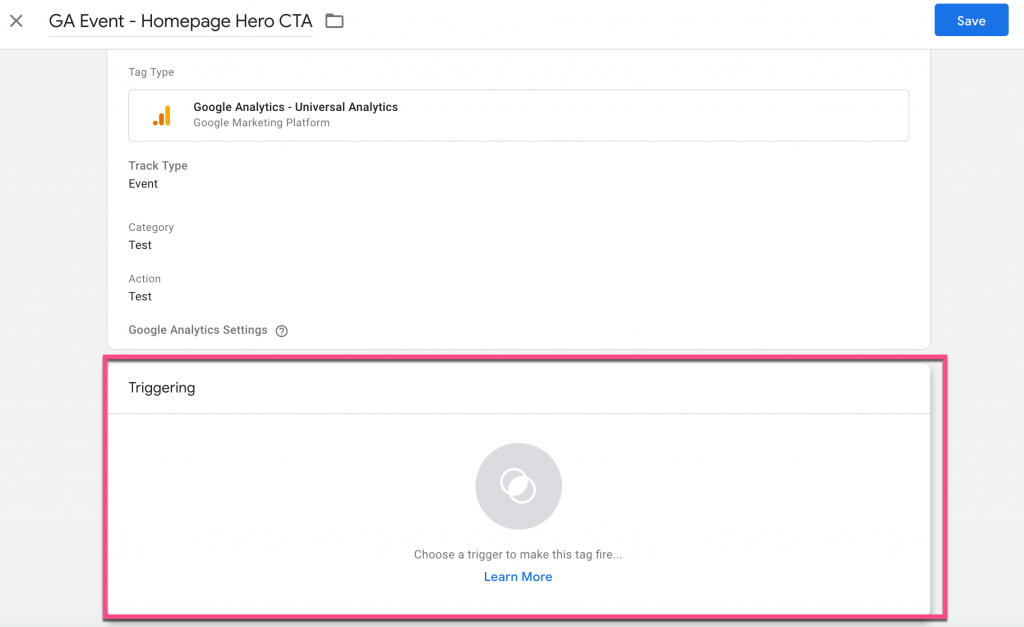
- Under “Track Type” choose “Event” and then fill out your Category, Action, and Label event details.Disclaimer: make sure you have a proper naming convention for your events as far as Category, Action, and Label go. This will save you a lot of time when you’re analyzing.

- Once you save this, select the “Triggering” region underneath your Event details and choose the trigger you created for your micro conversion.

- Save the tag and publish your workspace. Your GA Event for your micro conversion is now good to go for analysis!
Step 3: Setting Up Your Segment in GA
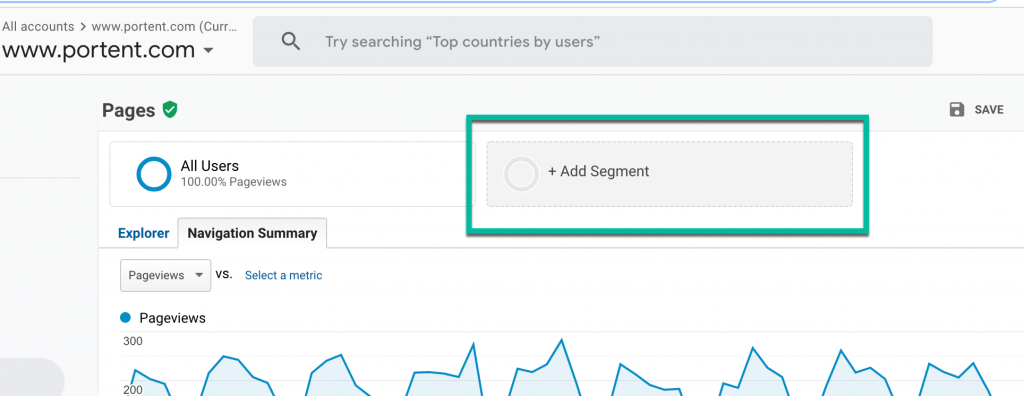
- To create a new segment in GA, choose the “Add Segment” option at the top of your view (next to “All Users”).

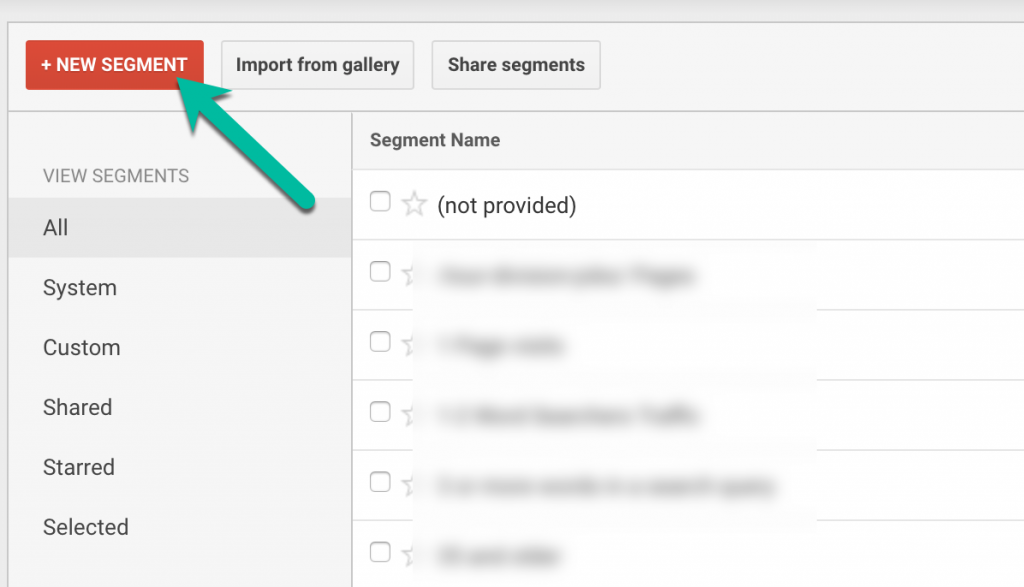
- Then choose “+NEW SEGMENT.”

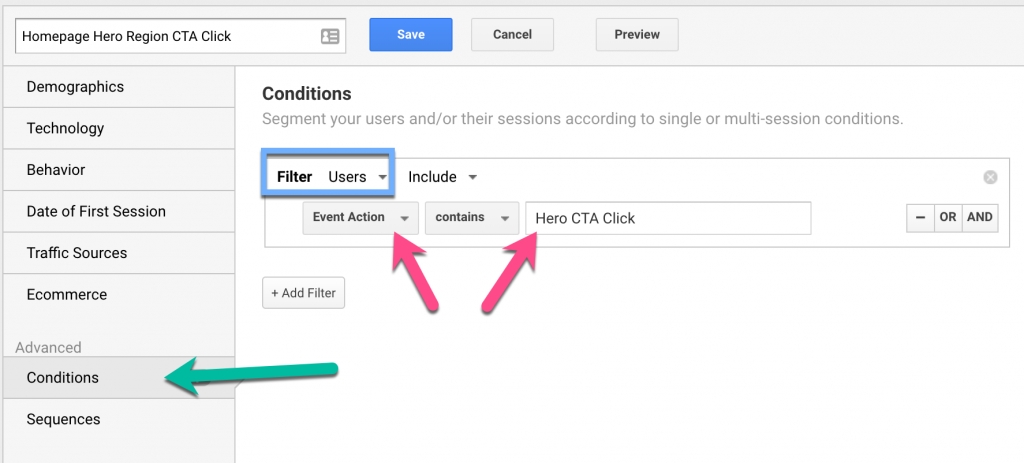
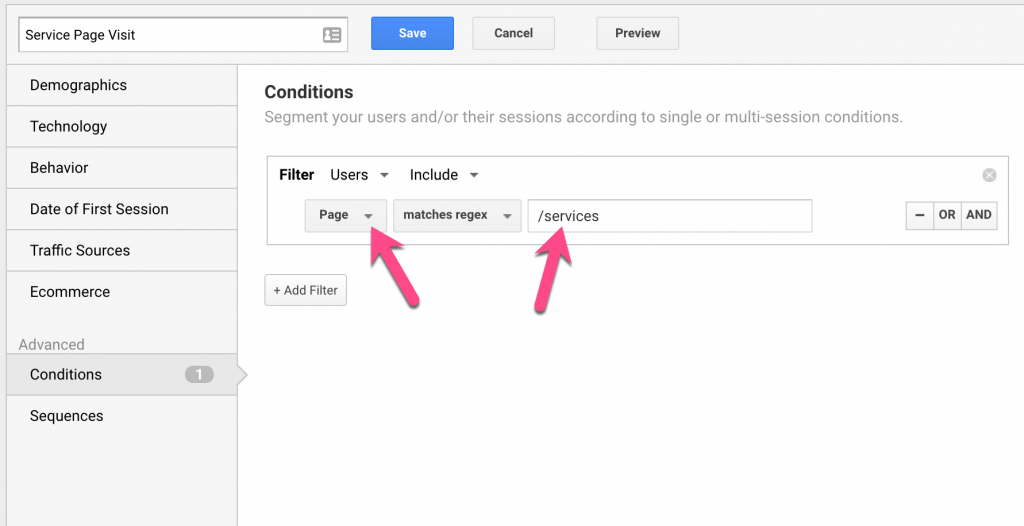
- Then you will go to “Conditions” on the left, choose the filter dropdown for User, then select the event criteria you created in GTM here.
- Disclaimer: for the Filter, you can select “User” as we directed or keep it with “Sessions.” Our Analytics Architect Michael Wiegand Explains which one to use and why:
“Choosing Users spans all sessions from a given person, but is limited to 90-day window. Choosing Sessions is limited to 1 stay, but allows you to look at more than 90 days. So the tradeoff really is a historical look back beyond 90 days (Sessions) versus the whole customer journey within 90 days (Users).”

- If your micro conversion is a page visit, you’ll follow the same steps but instead of “Event Action” you will choose “Page” and include the URL.

- Save your segment, you’re now ready to collect data and analyze.
Step 4: Analyzing Your Micro Conversions Using Segments
With micro conversions, the most valuable thing you can learn is how a micro conversion is affecting your macro conversions. The goal here, as mentioned, is to figure out if people who experience this micro conversion are more or less likely to achieve a macro conversion.
Compare Segment Versus Baseline
A good starting point is to select the “All Users” segment at the same time as your micro conversion segment. Here, you’ll be able to see how your segment of micro-converters does against the baseline.
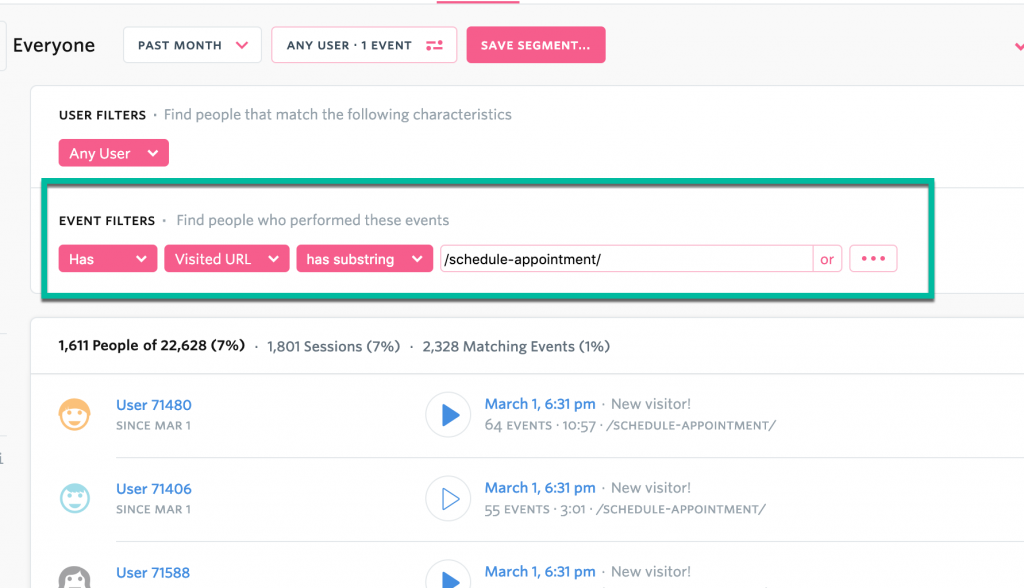
For example, for an automotive industry client, we created a segment (micro conversion) for users who visited their special offer page. The macro conversion, in this case, is when a user starts to schedule an appointment to get new tires.
The findings from tracking this micro conversion were counterintuitive but led us to discover a bigger problem that needed to be solved.

Somehow, users who visited the special offer page actually had a lower conversion rate than all users combined.
Thanks to tracking this micro conversion, we were able to spot a serious pain point on the site and take action to fix it.
Compare Similar Segments Against Each Other
Say that you have several different CTAs on your site that bring the user to the same lead generation page. You can set up micro conversions for each of those different CTAs and see which one(s) lead to a higher conversion rate.
Another client, who provides free quotes for solar energy installation, had four different treatments on their site to get users to the “Get a Quote” page.
We created a micro-conversion segment for each of those CTAs and compared them all against each other.
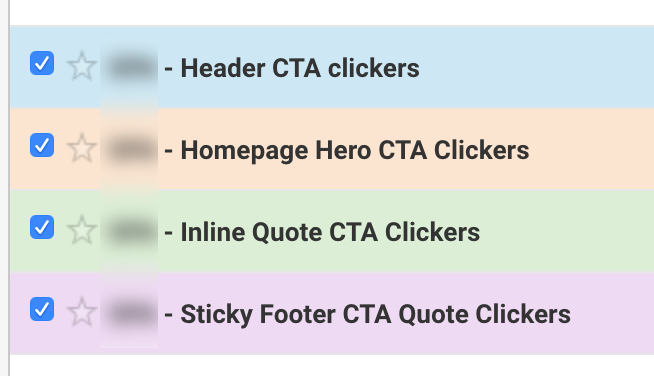
Now it can get a little busy here, but you can clearly see how each CTA did as far as the macro conversion page it led users to.

In this example, we learned that the “Homepage Hero CTA Clickers” are much less likely to convert than users who engaged with the other CTAs.
Our actionable takeaway was to replace the homepage hero CTA with one that was a little higher up in the funnel.
Final Thoughts
When you are analyzing these micro conversions, don’t stop at the first insight you come across. You should continuously compare them against all the different goals you have set up in GA. And remember to be on the lookout for false positives!
Pro Tip: the best way to avoid false positives is to validate your findings with either a deeper analytics dive or through an A/B test.
If you find yourself creating segments for every little interaction on your site, don’t fret. While it’s possible to get a little carried away with these, it’s better to have a larger pool of micro conversions to analyze than having to go through steps 1-2 to set up the tracking for them.
The post How to Track Micro Conversions with Google Analytics appeared first on Portent.